
SSL Certificate
Deploy an SSL certificate to enable HTTPS encryption of websites, trusted identity authentication and prevent against data leaks or tampering during transmission.
Get SSL Certificate >Blog > How to Complete Domain Control Validation (DCV) When Applying for an SSL Certificate?
Tag:
Domain Control Validation
NicSRS
5195:0
CatherineAugust 1 2023
In“How to Apply for OV and EV SSL Certificates?", we mentioned the requirement for domain ownership verification after purchasing an SSL certificate. This article will walk you through this application process on NicSRS and introduce the three methods of domain verification.
There are three methods to perform the domain validation: Email verification, DNS verification, and HTTP/HTTPS File verification.
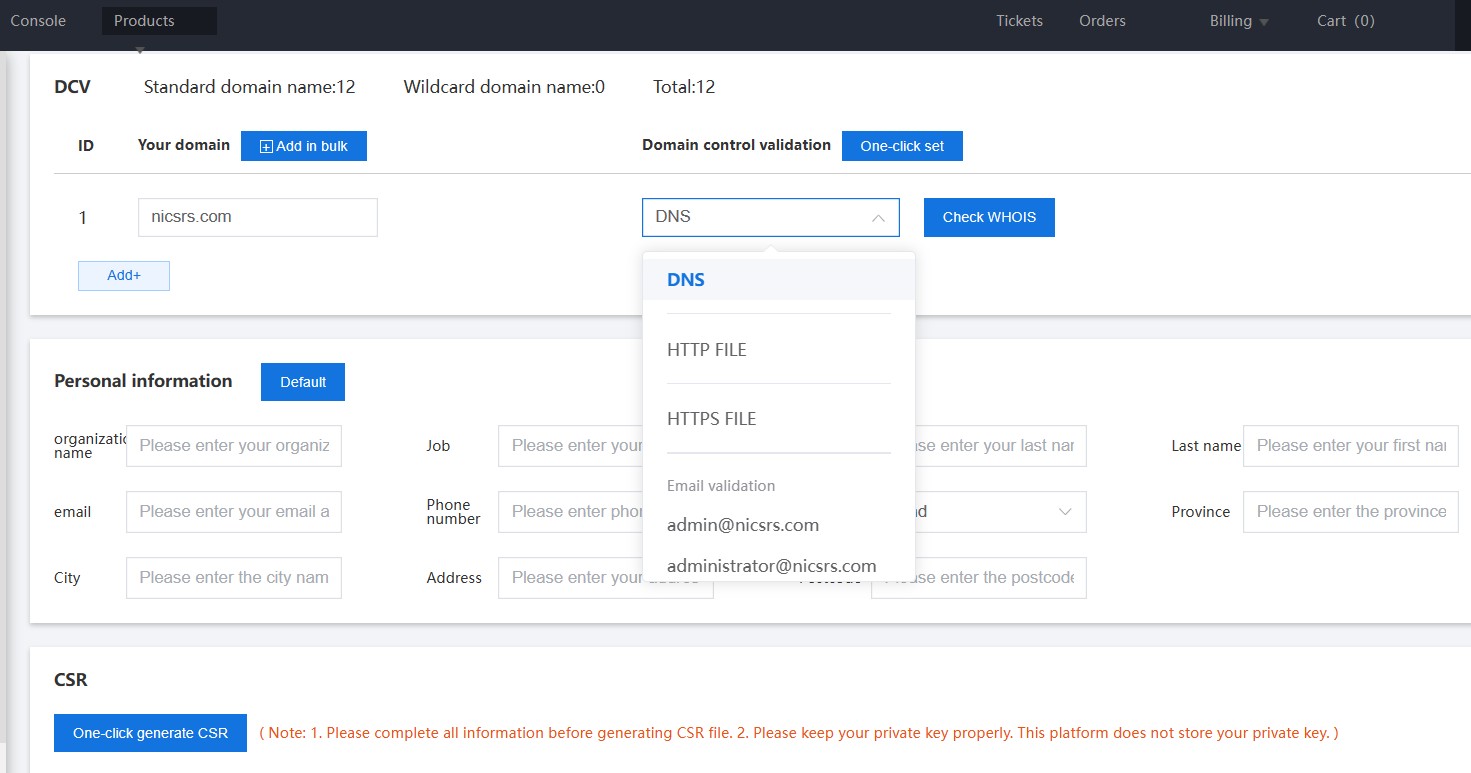
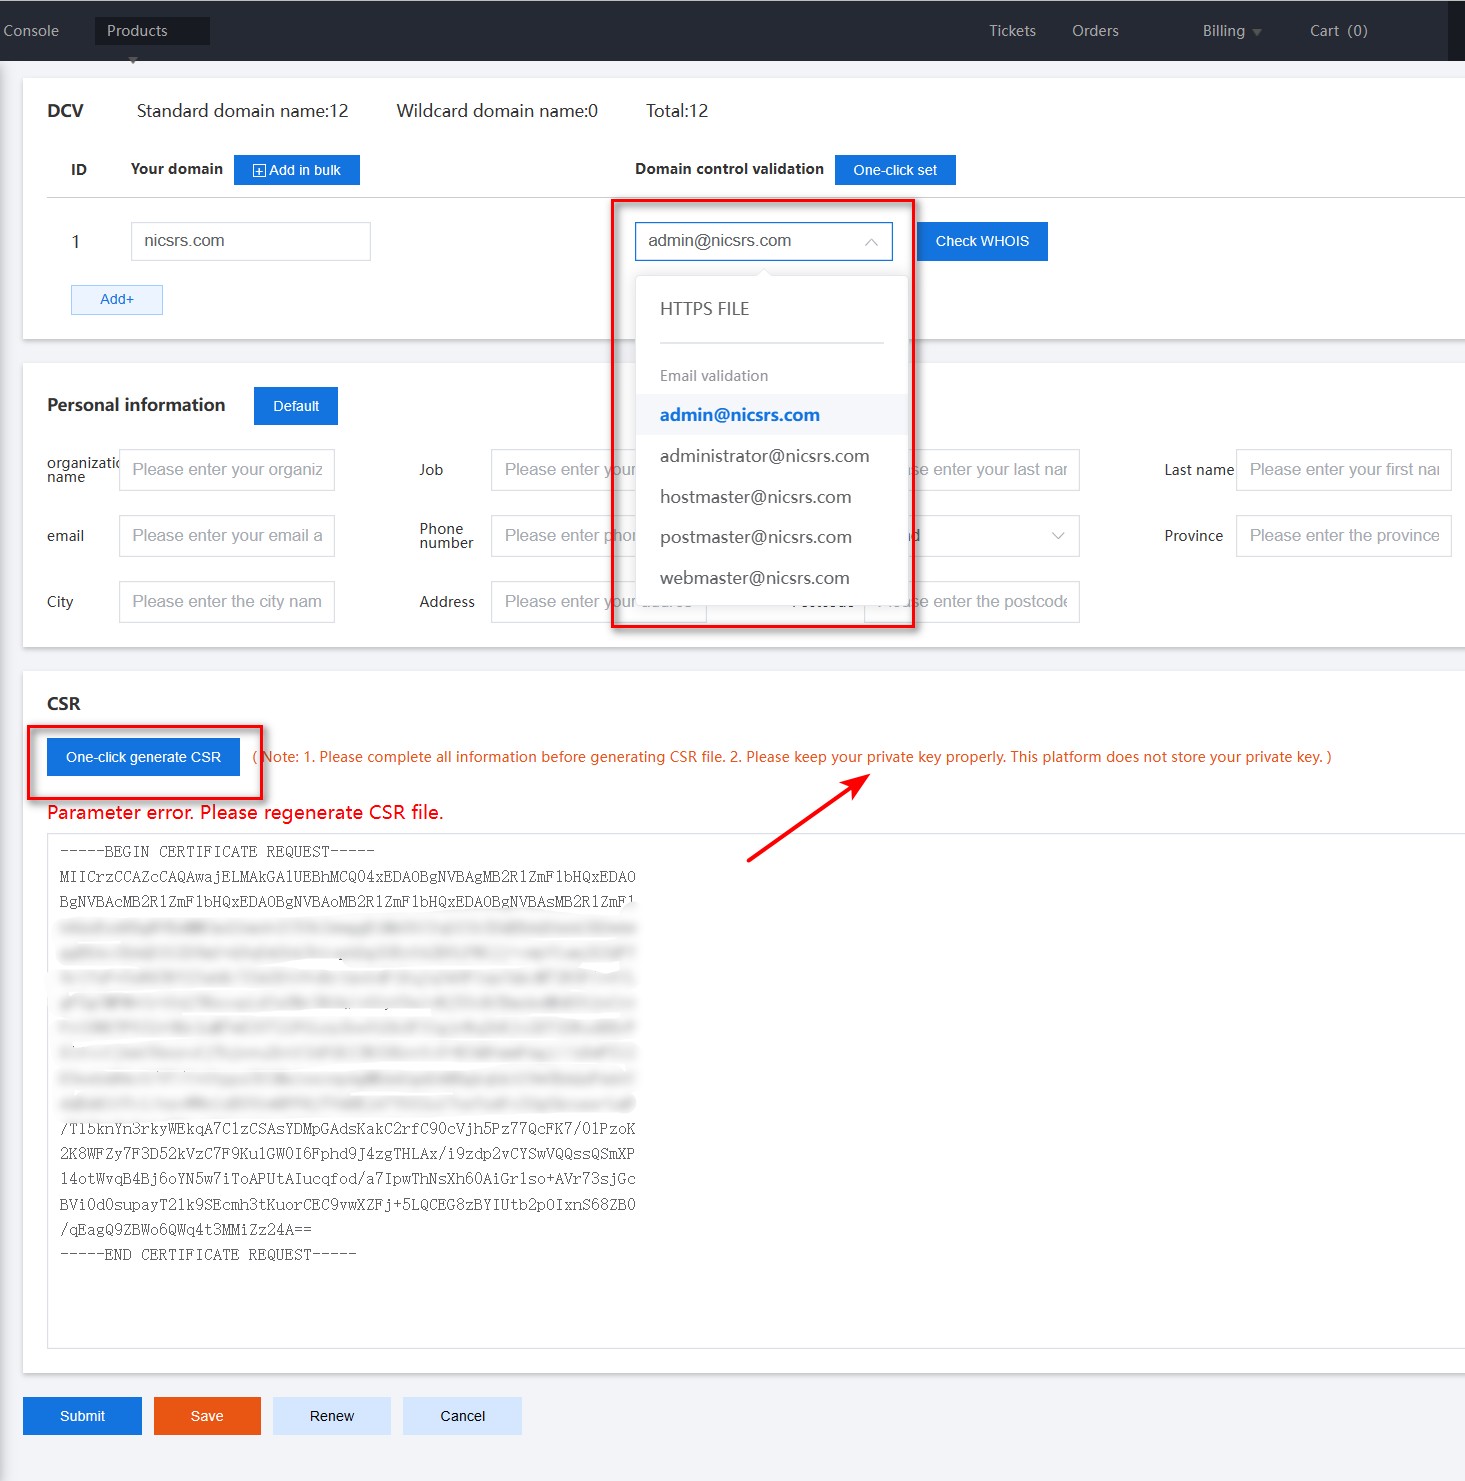
If you have purchased an SSL certificate from NicSRS, upon entering the application page, kindly fill in the relevant information from top to bottom as per the page instructions. Choose the domain verification method, provide your personal contact information, and easily generate the CSR with the button "One-click generate CSR".
Below we’ll introduce how to perform these three domain verification methods respectively.
1. Email verification
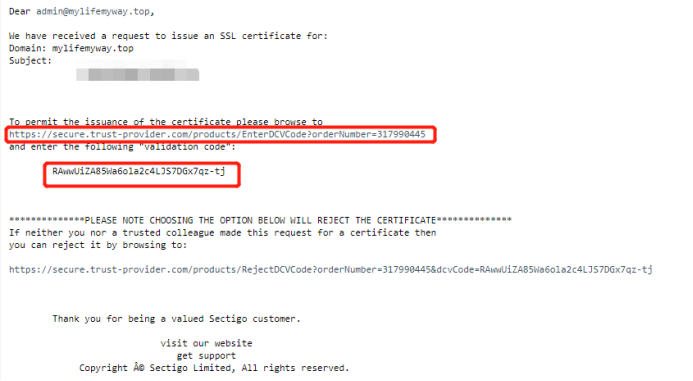
Email verification can only be done through the email addresses of a few specified domain-related or whois emails listed below. You may choose any one of them for the verification process. In case the specified email addresses are not available, you have the option to create such domain-related emails within your server's email system. It is important to note that this method does not support using other types of email addresses for domain verification. After selecting the email verification method, complete the required information and generate the CSR with "One-click generate CSR". Be sure to securely store the key file named after your domain name, as this file contains your private key.
After submission, check the chosen email inbox for the domain verification email sent by the Certificate Authority, and follow the instructions in the email to complete the domain verification process.
2. DNS verification
DNS verification involves adding a CNAME record.
Adding a CNAME Record.
Select "DNS Verification" from the DCV list. There is no need to choose email verification at this stage. After providing your personal contact information below, submit the form. Once the page refreshes, return to the domain verification section to obtain the DNS verification details.
Login to your domain manager panel and add a new DNS record for the domain you are applying the certificate for. Choose the record type as CNAME, and fill in the Hostname (if it’s a subdomain, please include the prefix) and Record Value as indicated in the screenshot below.

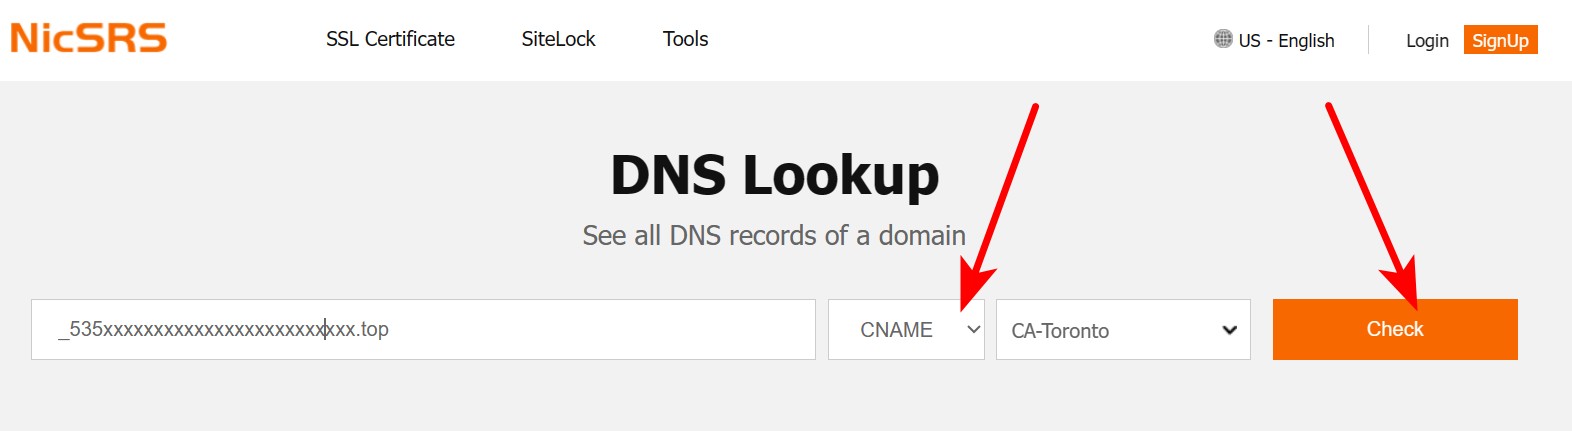
How to check the CNAME record is accessible: Open the DNS lookup tool, enter the CNAME hostname, and click on “CNAME” as shown in the screenshot below.
3. HTTP/HTTPS File verification
Note: this method is not supported for Wildcard SSLs.
If you have chosen file verification, you need to place the verification content in the .well-known\pki-validation\ directory located in the root of your domain name. The process is similar to adding a CNAME record. As shown in the figure below, create a new TXT file and use this as the file name, then copy this and place in the file.
Access path:
- Sectigo SSL certificates placement path: http://example.com/.well-known/pki-validation/filename.txt (This path must be publicly accessible).
- Digicert/Geotrust SSL certificates placement path: http://example.com/.well-known/pki-validation/fileauth.txt
- GlobalSign SSL certificates placement path: http://example.com/.well-known/pki-validation/whois.txt or whois.html.

Accessing the URL to see if the file is accessible externally.

RELATED
2026-07-17 11:10:00
2026-07-08 10:55:35
2026-06-30 10:55:44
2026-06-25 11:46:30
2026-05-21 10:31:22
Categories

Free SSL Tools
Top Posts
Comments